From Idea to Live MVP in 90 Days: The Exact Playbook We Use

Ninety days is enough time to get a focused product into real users' hands. It is not enough time to build every feature that appeared in the first pitch deck. That distinction is where most MVP projects either gain momentum or quietly become a nine-month backlog.
If you are working out how to build an MVP, begin with a promise to a specific user: they can complete one valuable job better than they can today. The work that follows is about protecting that promise. Each week should either reduce product risk, prove the core journey, or make launch safer.
This is the playbook we use when a founder needs more than a prototype but cannot afford a long, foggy delivery cycle. You will leave with a plan for deciding what stays, what waits, and what must be true before the next phase begins.
What you will build in a 90-day MVP
An MVP is not a thin copy of a mature product. It is the smallest credible version of a product that lets a defined group of people complete its central task and gives you a way to learn from their use.
For a scheduling product, that may mean a customer can find a time, book it, receive confirmation, and an operator can manage the booking. It does not mean a marketplace, a mobile app, complex reporting, referral rewards, multi-language support, and every calendar provider on day one.
The useful output at the end of this plan is:
- a working production application around one core workflow
- a small, intentional set of user roles
- essential notifications, data handling, and support paths
- a way to observe behaviour and collect feedback
- a launch decision based on evidence, not optimism
Before starting, name one accountable product owner. That person does not need to write code, but they must settle product questions quickly. A team that waits three days for every decision loses its calendar to uncertainty.
Weeks 1-2: scope the promise, then cut hard
The first fortnight looks less dramatic than screens or code, yet it does the most to prevent a late project. Start with customer conversations, existing support messages, sales calls, or domain knowledge. You are trying to learn the painful moment that makes someone look for a solution.
Write a one-sentence outcome in this form: “When [user] needs to [job], they can [result] without [current pain].” If it needs several sentences, it is probably describing a category rather than a first release.
Map the single critical journey
Put the journey on one page, from entry to successful completion. Include the user's action, the system response, and the moment they know it worked. Then ask a ruthless question at every step: does removing this stop the user from reaching the promised outcome?
Keep the parts with a clear yes. Put the rest into one of three buckets:
- Later: valuable work that does not block the core journey, such as saved filters, advanced exports, themes, or referral programmes.
- Manual first: work a person can handle while demand is still unknown, such as onboarding review, exception handling, or a concierge setup service.
- Not this product: ideas that solve a different job, attract a different user, or require a separate business model.
“Manual first” is often the most powerful choice. It lets you prove that customers need an outcome before you automate every edge case around it.
Set the first checkpoint: a one-page scope agreement
By the end of week 2, the team needs a signed-off scope note, not a cloud of tickets. It should state the target user, the core journey, included roles, excluded features, success signals, assumptions, and open decisions with owners.
Also choose how requests will enter the project. New ideas are welcome, but they go into a change list rather than directly into the current sprint. Review that list at a scheduled point. If a request is essential, swap it for work of similar size; do not simply add it.
This is a practical use of the short feedback loop described in the Scrum Guide: inspect what you know, adapt deliberately, and preserve a clear goal. The checkpoint is passed only when every decision-maker can explain what the MVP does not do.
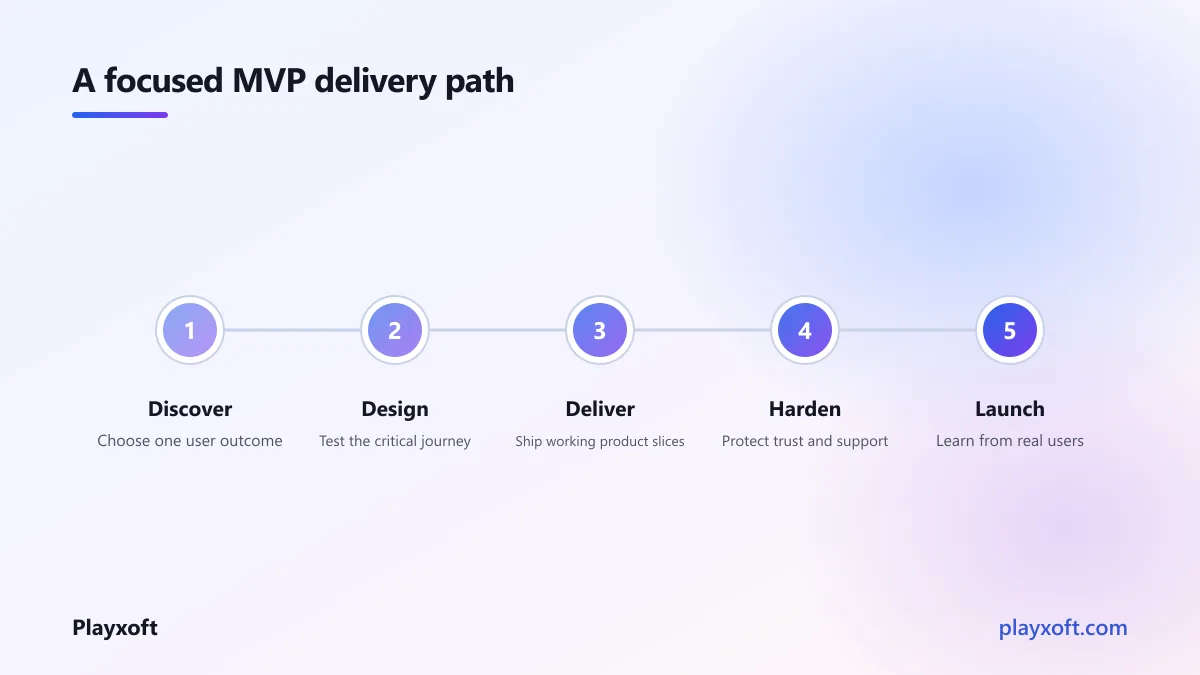
Weeks 3-4: turn scope into design and architecture
Now make the first journey visible. Begin with low-fidelity flows. Use rough wireframes to test the sequence, wording, and moments where a user may hesitate. This is faster to change than polished design and makes disagreement useful: you can point to a screen and choose.
Once the flow holds together, produce the minimum design system for launch: type, colours, spacing, form states, buttons, errors, and loading states. Do not spend the fortnight designing screens that belong to deferred features. A consistent small system is more valuable than a beautiful unused component library.
Choose boring, maintainable foundations
Architecture should match the question you are trying to answer. A new MVP rarely needs distributed services, a custom workflow engine, or infrastructure designed for hypothetical scale. It does need clear boundaries, secure access, reliable data, deployable environments, and logs that help you investigate a real issue.
Decide early:
- the application stack and hosting approach
- the data model for the core journey
- authentication and role permissions
- external services required at launch, such as payments or email
- error reporting, analytics events, and a backup approach
Document the important interfaces before several features depend on them. A compact API contract can prevent frontend and backend work from drifting apart; the OpenAPI Specification is a useful reference for describing those contracts clearly.
The week 4 checkpoint is a clickable flow, an agreed data model, a thin architecture note, and a delivery backlog ordered by user value. You should be able to demonstrate the happy path without explaining what it will eventually become.
If you'd like a hand turning a crowded feature list into a shippable first release, talk with the Playxoft team. We can help you pressure-test the scope before it becomes expensive code.
How to build an MVP in weeks 5-10: ship vertical slices
The middle of the project is where discipline matters most. Build in vertical slices: a small, working piece of the user journey that touches the interface, business rules, data, and deployment path. A slice gives you something a person can use. A layer of backend work or a stack of disconnected screens does not.
Start with the thinnest happy path. For example, a user signs in, creates the central record, sees confirmation, and an operator can view it. Then add the minimum validation and exceptions that make that path credible. This order exposes false assumptions early.
Weeks 5-6: make the core action real
Build the entry, the primary action, the saved result, and the simplest management view. Connect real data as soon as possible. Placeholder data can make a risky workflow look finished.
At the end of week 6, run a hands-on demo with people who were not in the daily build. Ask them to complete the job without coaching. Watch where they pause, what they call each thing, and which expectation the product fails to meet. Record the observations; do not defend the design in the room.
The checkpoint is direct: can a user complete the promised outcome from start to finish in a deployed environment? If not, pause adjacent work and finish the path. A half-built admin panel is never a reason to leave the core action unreliable.
Weeks 7-8: add trust, operations, and learning
Add the pieces that let the product operate responsibly: account recovery, permission checks, confirmation messages, useful empty states, and the operator tools needed to resolve common issues. Instrument the few events that reveal whether the core journey is being started and completed.
This is also when integration risk gets real. Test third-party services with representative data and failure conditions, not just a successful demo account. For payments, messaging, or data imports, define what the user sees when the external service is slow or unavailable.
Keep additions tied to a release question. “Will this help the first user achieve the promised result?” is a better filter than “Would this be nice to have?” The latter is how a workable plan grows invisible branches.
Weeks 9-10: finish, do not expand
Use these weeks to close gaps in the core workflow, improve the places user testing exposed, and make the product legible. This is not a feature lottery. The remaining work should fit one of three reasons: it blocks completion, it protects trust, or it enables the team to support the launch.
Hold a scope review before starting anything new. For each request, write its user impact, implementation impact, and what it would displace. If it cannot displace anything, it belongs after launch. This is the checkpoint that keeps a 90-day MVP from acquiring a second product inside it.
Weeks 11-12: harden, rehearse, and launch
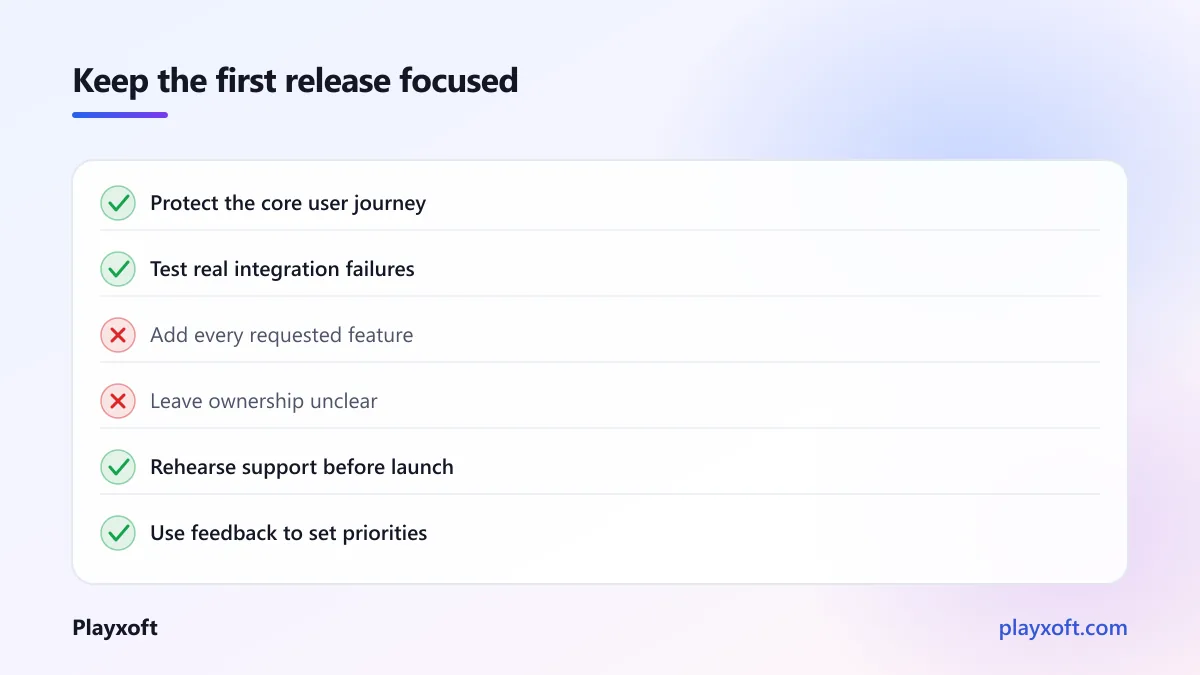
Hardening means making the existing product dependable, not making it larger. Review the main journey on common devices and browsers, test unhappy paths, verify permissions, check backup and recovery steps, and confirm that someone will see critical errors.
Use a simple release checklist. Include production configuration, domain and email setup, access removal for former contributors, support ownership, analytics verification, and a rollback decision. Security work should be proportional to the product's risk, but it cannot be an afterthought; the OWASP Application Security Verification Standard offers a practical catalogue of controls to review.
Rehearse the first week after release
Before launch, simulate a support request, an account-access problem, and a broken integration. Decide who responds, where the issue is logged, and how you tell an affected user what is happening. A calm response plan is part of the product experience.
Launch to a deliberate first group when possible. Stay close to their behaviour. Look for the places they abandon the journey, the questions they repeat, and the outcomes they celebrate. The goal of launch is not applause for a finished project. It is a reliable signal about what to improve next.
The final checkpoint asks four questions:
- Can the target user complete the core journey without help?
- Can the team see when that journey fails or succeeds?
- Can someone support a real customer tomorrow?
- Is the next priority based on observed behaviour rather than a pre-launch wish list?
If any answer is no, fix that before broadening the launch. It is cheaper to delay a promotion than to invite people into a product you cannot yet support.
Your next move: build the MVP that can actually launch
Knowing how to build an MVP is mostly knowing how to make and keep decisions. Protect one valuable user journey, release it in working slices, and let evidence earn every extra feature. That is how a focused 90-day effort stays focused.
If you want an experienced technical partner to turn your idea into a launch-ready product, book a free consultation call with Playxoft or email nitheesh. We will help you shape a plan that moves from first decision to real customer learning.